Please fill out the form below to request a quote or to request more information about us. please be as detailed as possible in your message, and we will get back to you as soon as possible with a response. we're ready to start working on your new project, contact us now to get started.
A Closer Look at the Installation Process of a 3 Inch Cat Back Exhaust System
2026-09-05
Maxdo
34
Tune in, car enthusiasts and DIY experts alike! Are you ready to transform your ride with a 3-inch cat-back exhaust system? This system is more than just a bolt-on upgrade; it's a self-tuning mod that enhances both your cars performance and driving experience. Imagine a smoother, more refined drive combined with a robust soundget ready to rev up your engine and take your car to the next level.
Understanding the Benefits of a 3-Inch Cat-Back Exhaust
Upgrading to a 3-inch cat-back exhaust system is like tuning up the entire engine of your car. Heres why its worth the investment:
1. Increased Power and Performance
- Improved Efficiency: A 3-inch system allows for better airflow, increasing horsepower and torque.
- Smooth Acceleration: Enjoy a more responsive drive and smoother acceleration, making every ride more enjoyable.
2. Refined Sound Quality
- Balanced Tone: The system provides a deep, rich sound without being too harsh or muffled.
- Enhanced Driving Experience: The sound adds a layer of excitement and improves the overall driving experience.
3. Lightweight and Durable
- Reduced Weight: A 3-inch system is generally lighter than a full 4-inch setup, improving handling and fuel efficiency.
- Durability: High-quality materials ensure longevity and reliability.
4. Cost-Effective
- Significant Performance Gains: Get a noticeable performance bump without the hefty price tag of a full 4-inch system.
- Balanced Upgrade: A sensible middle ground for those looking to upgrade without overhauling their entire exhaust system.
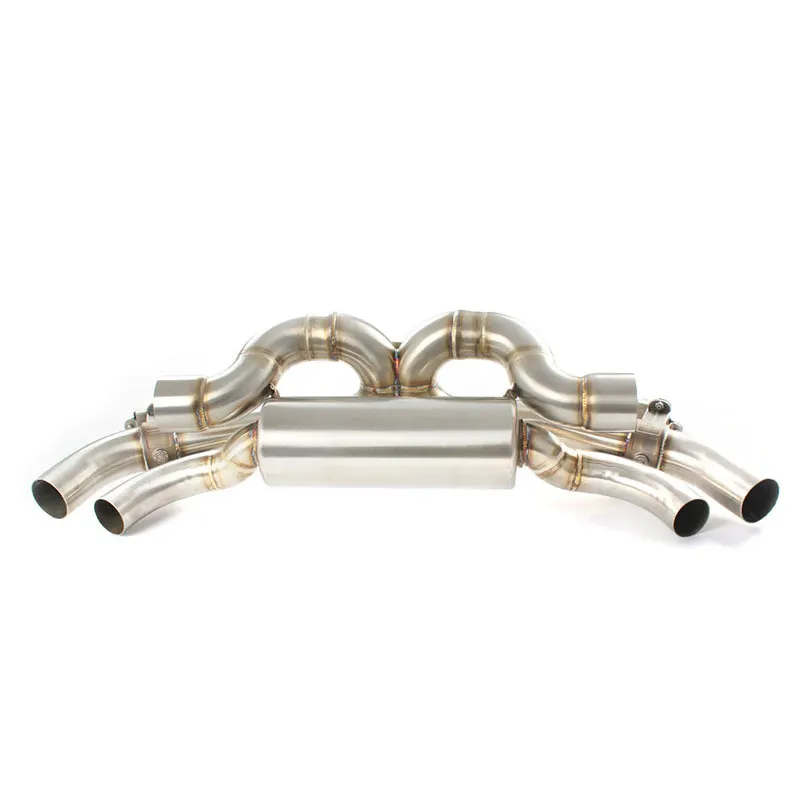
Choosing the Right Components
Selecting the correct components is crucial for a seamless installation. Heres what you need to know:
1. Key Components
- Cat-Back Delete System: Removes the existing rear portion of the exhaust system.
- High-Flow Pipe: Enhances airflow to the catalytic converter for better performance.
- Catalytic Converter: Ensures emissions standards are met while boosting power.
- Muffler: Filters and modulates the exhaust sound for a balanced tone.
2. Compatibility
- Ensure all components are compatible with your vehicles engine specifications and emissions regulations.
- Consult your vehicles manual or a trusted professional for specific recommendations.
3. Quality Evaluation
- Look for components constructed from high-quality materials.
- Check reviews and ratings for reliability and durability.
- Avoid cheap knock-offs to ensure longevity.
Preparing for Installation
Proper preparation is key to a smooth installation process. Heres what you need to do:
1. Tools and Equipment
- Wrenches and Ratchet Sets: For removing and securing parts.
- Hammer: To break loose stubborn fittings.
- Torque Wrench: To tighten fasteners to the correct specifications.
- Pry Bar or Impact Gun: For removing old components.
- Socket Set: For accessing hard-to-reach areas.
2. Safety Gear
- Eye Protection: To keep debris out of your eyes.
- Gloves: For added grip and protection.
- Safety Harness: If working with elevated areas.
3. Vehicle Preparation
- Move your car to a clean and well-ventilated workspace.
- Disconnect the battery to avoid accidental ignition.
- Remove the old exhaust components.
- Clean the engine bay to ensure a clear and accessible space.
Installation Process
Now, lets dive into the detailed steps of the installation:
1. Removing the Old Exhaust System
- Disconnect the battery.
- Start by removing the catalytic converter, muffler, and piping.
- Use a torque wrench to loosen and remove any necessary fasteners.
2. Installing the New Catalytic Converter
- Carefully install the new catalytic converter in the appropriate location.
- Ensure it is securely fastened and aligned properly.
3. Attaching the High-Flow Pipe and Muffler
- Connect the high-flow pipe to the catalytic converter.
- Attach the muffler to the pipe and ensure tight junctions.
- Check for proper fit and balance the system.
4. Securing Remaining Components
- Connect the muffler to the passenger side.
- Secure all remaining components, ensuring everything is tight and properly aligned.
- Use a torque wrench to ensure all fasteners are torqued to the correct specifications.
5. Final Tightening and System Testing
- Double-check all connections and bolts.
- Conduct a final test to ensure the system is functioning properly.
- Listen for any leaks or unusual sounds.
Troubleshooting Common Issues
Even with meticulous preparation, you might encounter a few issues. Heres how to address them:
1. Leak Concerns
- Inspect all connections for tightness and ensure there are no cracks or damages.
- Use gasket sealant if necessary to prevent leaks.
2. Misalignment
- Ensure all components are properly aligned to avoid noise and performance issues.
- Use alignment tools or professional assistance if needed.
3. Hanging Components
- Check that all components are securely fastened and not hanging.
- Adjust as necessary to maintain a clean and stable system.
Post-Installation Tips
After the installation, proper maintenance is key to keeping your exhaust system in top shape:
1. Tire Clearance
- Ensure theres enough clearance for the suspension to operate smoothly.
- Adjust the suspension as needed to prevent issues.
2. Suspension Alignment
- Adjust the suspension to maintain optimal performance and handling.
- Regularly check for any changes in tire wear patterns.
3. Maintenance Tips
- Regularly inspect the system for any signs of wear or damage.
- Clean the catalyst to prevent build-up and maintain efficiency.
- Replace the muffler at intervals to ensure continued performance.
Conclusion
Installing a 3-inch cat-back exhaust system transforms your ride, enhancing both the performance and the driving experience. By following this guide, youll be well on your way to a successful installation. Whether youre a DIY enthusiast or a professional installer, this system offers a balanced blend of power, sound quality, and cost-efficiency. Embrace the process, enjoy the enhancements, and take your car to the next level. Happy revving!
GET IN TOUCH WITH Us
Copyright © 2026 Shenzhen Maxdo Automotive Parts Co., Ltd. - www.maxdoexhaust.com | Sitemap | privacy policy